All Change Management Issues follow a workflow consisting of different statuses. The workflow is configurable so that you can, for example, add constraints to the status transitions. A project must have at least one workflow, and supports having multiple workflows, so you can set different workflows for different issue types. This article describes how to create a workflow and statuses.
Prerequisites
- You must have "Change" access rights to the CMS project OR the Administrator role in the server.
Workflow Setup
Workflows are created under the Setup menu. In the project, click Setup and then select Workflows.

The Workflows pane lists all workflows in the project.
When you select a workflow, its Name will appear In the Workflow Name field, and you can change it here at any time.
The Workflow Description field can be used for an optional description of the workflow. You can edit in the box, or double-click to open the Description editor dialog.
When you select a workflow in the Workflows pane, its statuses will display in the Statuses pane.
Creating a New Workflow
Naming a Workflow
When a project is created, it will include a workflow called "Main", by default. An example of this is shown above. You can use this as your starting point if you wish, and rename the workflow by selecting it and changing the name in the Workflow Name field.
Otherwise, right-click in the Workflows pane and select New Workflow.

In the Enter Name dialog, enter the new workflow's name and click OK. The new workflow will display in the Workflows list.

You can enter an optional Workflow description by double-clicking in the description area.

Defining Statuses
Once the workflow is created, you'll want to define various statuses in the workflow since, for most use cases, issues are to move from one status to another in their journey to completion. To create new statuses, right-click on the Statuses pane and select New Status.

Enter a name for the status and click OK. The new status will display in the Statuses pane.

By default, new statuses are of Type "Open". Type is a meta status and it is described in more detail below.
When selecting the new status, its information is displayed to the right. There you can change its Name in the Status Name field. You also have the option to add a Color by using the browse button provided.

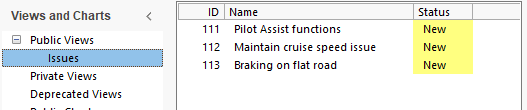
The color will display in the Statuscolumn in views (if the Status column is configured to be included):
You can change the Status Type, as needed. This is the meta status type of the issues assigned to the status.

Open vs. Closed Meta Status
An "Open" meta status means that issue is still in a workflow, while the "Closed" meta status means that the issue has been completed and reached the end of its workflow. The distinction between "Open" and "Closed" is useful or apparent in views like the Issues in time, where the graph can indicate that the life cycle of an issue has come to an end, or in Overview, where only issues with an "Open" meta status will display.
In the Status Description field, you can enter an optional description of the selected status, e.g., how the status relates to the development process.

Repeat the above steps to create all of the needed statuses in the workflow.
The statuses will appear in the same order in the Status drop-down in the Issue editor as they are on the Workflows tab.

Configuring the Workflow
If you want to allow any transition to any status in the workflow, then you do not need to configure the workflow. Users will be able to move their issues freely between all statuses and there will be no preconditions or constraints tied to the transitions. If, however, you want to add constraints to the statuses and to the transitions, then you will need to define a workflow configuration.
What's Next?
If you haven't already created the Issue Types in your project, see Creating Issue Types.